Step-by-Step Guide to Make Perfect Handmade Pastry Dough with a Difference
Hello everybody, I hope you are having an incredible day today. Today, we're going to prepare a special dish, Recipe of Homemade Handmade Pastry Dough with a Difference. It is one of my favorites food recipes. For mine, I am going to make it a little bit unique. This is gonna smell and look delicious.
Let's face it, cooking isn't just a top priority at the lifestyles of every person, woman, or child on Earth. In fact, far too people have forced learning to cook important within their own lives. Which usually means that we usually exist on convenience foods and boxed mixes rather than just taking the effort to prepare healthful meals to the families and our own personal enjoyment.
Which means at any given time in your cooking learning cycles there's quite probably somebody somewhere that's worse or better at cooking more than you personally. Take advantage of this as the best have bad days when it comes to cooking. There are many men and women who cook for different reasons. Some cook as a way to consume and survive although some cook since they actually like the process of cooking. Some cook through the times of emotional trauma and others cook out of absolute boredom. Whatever your reason for cooking or understanding how to cook you need to always begin with the fundamentals.
The fantastic news is that when you've heard the fundamentals of cooking it's improbable you will ever need to relearn them. This usually means that you could constantly buildup and expand your own cooking skills. As you find new recipes and increase your culinary skills and talents you will see that preparing your own meals from scratch is a whole lot more rewarding than preparing pre packaged meals that are purchased from the shelves of your local supermarkets.
Many things affect the quality of taste from Handmade Pastry Dough with a Difference, starting from the type of ingredients, then the selection of fresh ingredients, the ability to cut dishes to how to make and serve them. Don't worry if you want to prepare Handmade Pastry Dough with a Difference delicious at home, because if you already know the trick then this dish can be used as an extraordinary special treat.
To begin with this particular recipe, we have to first prepare a few components. You can cook Handmade Pastry Dough with a Difference using 8 ingredients and 19 steps. Here is how you can achieve that.
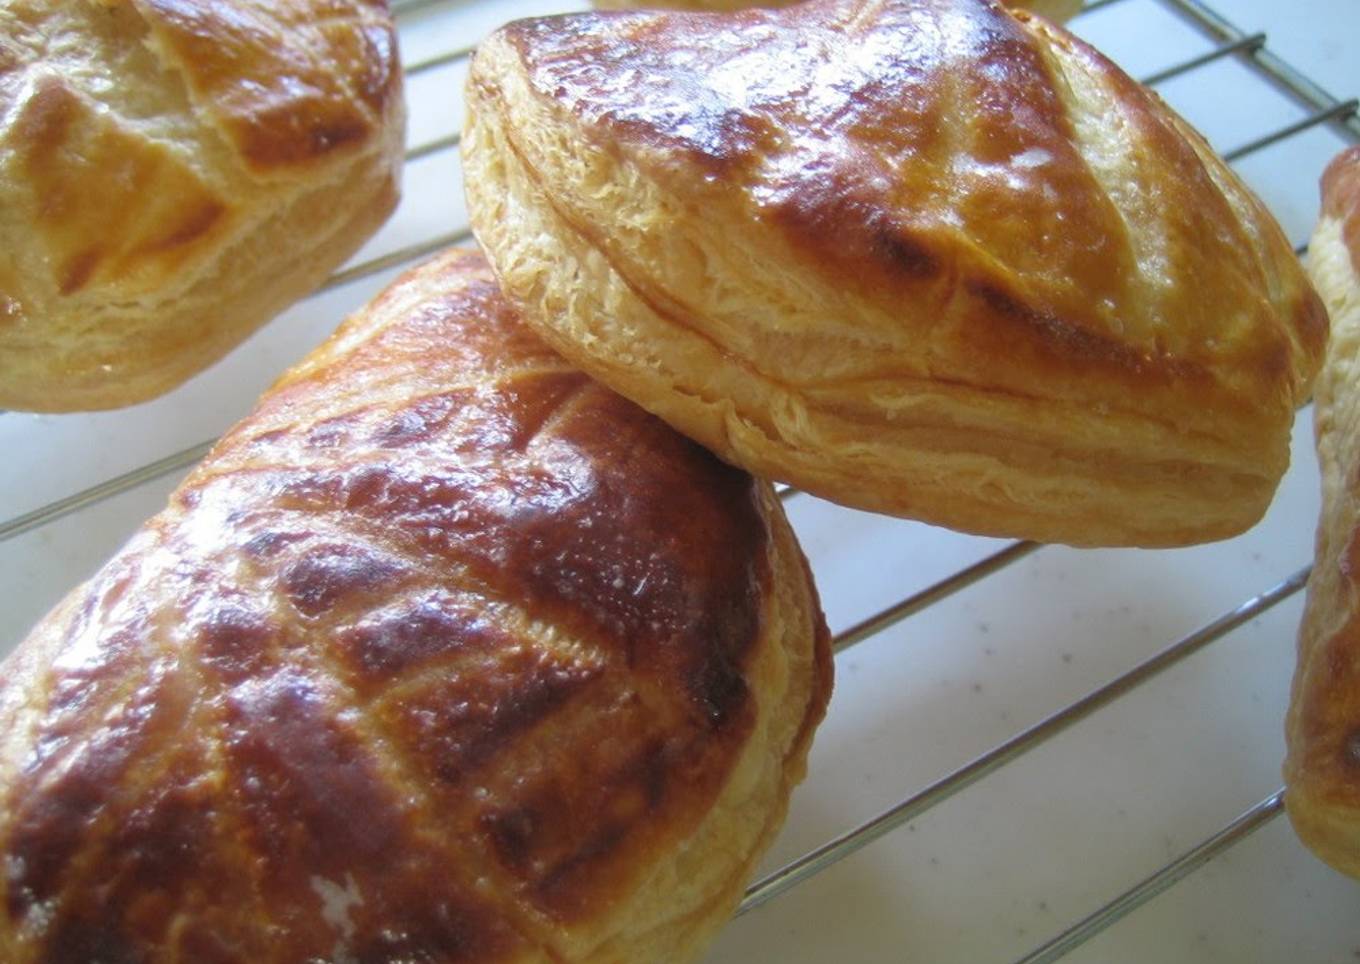
I used to think making pastry dough was too much work, and too difficult to get right and I didn't like doing it at all. But the one thing the chef (where I used to work) always praised were my pastries. So that was when I started to like making pastry dough. It really does taste so much better than frozen dough! The more you repeat it, the cleaner your work will become. Give it a try! Here are the keys to making your own pastry dough!! Be patient and let the dough rest! Dust with flour frequently but sparingly. When rolling out the dough, pay attention to how the shape will be when folded! As long as you pay attention to these points, you can make really delicious pastry dough! It's harder to make in the summer so if you are practicing, winter is the best time to do so! Recipe by France
Ingredients and spices that need to be Make ready to make Handmade Pastry Dough with a Difference:
- For the détrempe (flour and water paste):
- 150 grams Cake flour
- 150 grams Bread (strong) flour
- 30 grams Butter (melted)
- 150 grams Water (use chilled water in the summer)
- 6 grams Salt
- For the butter to fold in:
- 210 grams Butter
Steps to make to make Handmade Pastry Dough with a Difference
- Wipe your work surface very well. Combine the cake and bread flours and sift them onto the work surface. Make a well in the middle of the flour to form a donut shape.

- Put the salt, melted butter and 1 tablespoon of water or so into the well, and mix well to dissolve the salt. When the salt has dissolved, start mixing in the surrounding flour a little at a time. Remember how you used to mix water into sand in a sandpit and do it like that. (Thicken the liquid a bit at a time.)

- When the liquid has thickened quite a bit, add water little by little to dissolve the flour. The key is to add the water a little at a time! Also, don't ever break down the walls of the well! Otherwise your work surface will become flooded with water... Always pour the water onto the flour.
- When all the water has been added, use your pastry scraper in a cutting motion to mix the water in. (Don't knead the mixture; you don't want to develop the gluten in the flour.)

- When the water is mixed in, gather up the dough into a ball with the seams inside, and pull the surface a bit tight. The dough doesn't have to be smooth at this stage! As you let the dough rest in the refrigerator and fold in the butter, it will become silky smooth.

- Make a deep cross cut into the dough, wrap up in plastic and rest in the refrigerator for 30 minutes to an hour.

- While the détrempe is resting, prepare the butter that will be folded into it. Sandwich the butter between sheets of plastic film (make sure the plastic sheets are big enough to accommodate the butter when it's flattened) and beat down on it with a rolling pin to flatten it out. The butter is cold but it will become soft and silky.

- Cut and form the butter with a pastry scraper or other tool to neaten it up. It should become a neat square that's about the same size as the cutting edge of the scraper.

- Start folding the butter (beurrage) into the rested détrempe. Press out the détrempe that had the deep cross cut in it away from you as if you were pushing it. (It's hard to describe...) Turn the dough to press it out on all 4 sides.

- Here's how it should look at this point.

- After all 4 sides are pressed out, it should look like this. The middle should be a bit thicker than the rest.

- Put the squared off silky butter on the thick part of the dough. (Check the consistency of the butter. It should be just soft enough that if you press on it with your finger, it leaves a mark. If it's too hard it's difficult to roll out. Butter hardens right away when you put it in the refrigerator, so be careful!)

- Bring the opposing corners of the dough to the middle and fold. Do the same with the two other opposing corners. The key is to wrap the dough tightly around the butter so that there are no air pockets in between the layers.

- Roll out with a rolling pin. To start, push the rolling pin in small movements, then roll it back and forth.

- Dust with flour frequently but sparingly. (It's a bit complicated I know...) Flip the dough over as you roll it frequently too. (The dough does stick easily to the work surface...) When the dough has thinned out, roll it around the rolling pin and flip over. Roll until it's as long as the rolling pin.

- Start folding! Brush off any excess flour, and fold in about 1/4 of the dough.

- Bring the bottom part of the dough on top. Tightly seal the seams closed using the rolling pin. The key is to bring the folds all the way up to the corners. If the corners are rounded, pull on them with your hands to make them square like a puzzle. This way the dough will have a nice neat finish, and will be easier to handle too.

- Cut the dough in half. (If you don't do that and fold the dough in the middle, the first fold will stick out to the size, and the dough will split there.) Wrap tightly in plastic, and rest in the refrigerator for 15 to 30 minutes.
- Turn the dough 90 degrees from the previous step (so that the fold is on the side), and repeat steps 14 to 18 three more times. If you roll out the width (in the direction it was rolled before) first, it's easier to handle. The more you roll out the dough, the silkier it will get. Then you're done!
Additionally you will detect as your own experience and confidence grows that you will find your self more and more usually improvising when you go and adjusting meals to fulfill your personal preferences. If you'd like less or more of ingredients or want to create a recipe a little less or more spicy in flavor that can be made simple adjustments along the way so as to achieve this goal. In other words you will start in time to create snacks of one's very own. And that is something which you won't of necessity learn when it comes to basic cooking skills for newbies but you would never learn if you did not master those basic cooking skills.
So that is going to wrap it up for this special food Simple Way to Make Ultimate Handmade Pastry Dough with a Difference. Thank you very much for your time. I am sure that you can make this at home. There's gonna be interesting food at home recipes coming up. Don't forget to bookmark this page in your browser, and share it to your family, friends and colleague. Thank you for reading. Go on get cooking!
Post a Comment for "Step-by-Step Guide to Make Perfect Handmade Pastry Dough with a Difference"