Recipe of Super Quick Homemade "Kumahiko" Bear Icebox Cookie
Hello everybody, it is Louise, welcome to our recipe site. Today, I will show you a way to make a special dish, Steps to Prepare Homemade "Kumahiko" Bear Icebox Cookie. It is one of my favorites. This time, I am going to make it a little bit tasty. This is gonna smell and look delicious.
When it comes to cooking wholesome meals for the families, there is obviously some degree of dissention among the ranks. The good thing is that there are recipes that have become healthy but also the healthful nature of those recipes is significantly disguised. What they do not know in such instances shouldn't attract harm their way (outside of allergies, which should never be discounted ).
Wholesome cooking can be difficult because many people do not need to spend some time preparing and planning meals that our own families will not eat. At exactly the exact same time, we need our families to be healthy so that we are feeling compelled to learn new and improved ways of cooking healthy foods to our family to love (and regrettably in some situations scorn).
There are numerous that will argue that cooking healthy food costs a lot more than simply cooking the prepackaged food items that pack on the calories and additives. The truth of the matter is that if you compare the expenses with the medical bills for their near future for failing to accomplish this, they seem quite slight by comparison. Yes, very good food costs additional money. In many cases, that's a simple fact of everyday life. However, by learning portion control and eating the proper portions you just may find that you are now spending less as you adjust to the right amounts of food that you should be consuming in order to maintain a healthy and active way of life.
Many things affect the quality of taste from "Kumahiko" Bear Icebox Cookie, starting from the type of ingredients, then the selection of fresh ingredients, the ability to cut dishes to how to make and serve them. Don't worry if you want to prepare "Kumahiko" Bear Icebox Cookie delicious at home, because if you already know the trick then this dish can be used as an extraordinary special treat.
As for the number of servings that can be served to make "Kumahiko" Bear Icebox Cookie is 30 servings. So make sure this portion is enough to serve for yourself and your beloved family.
To begin with this particular recipe, we must first prepare a few ingredients. You can cook "Kumahiko" Bear Icebox Cookie using 7 ingredients and 28 steps. Here is how you cook that.
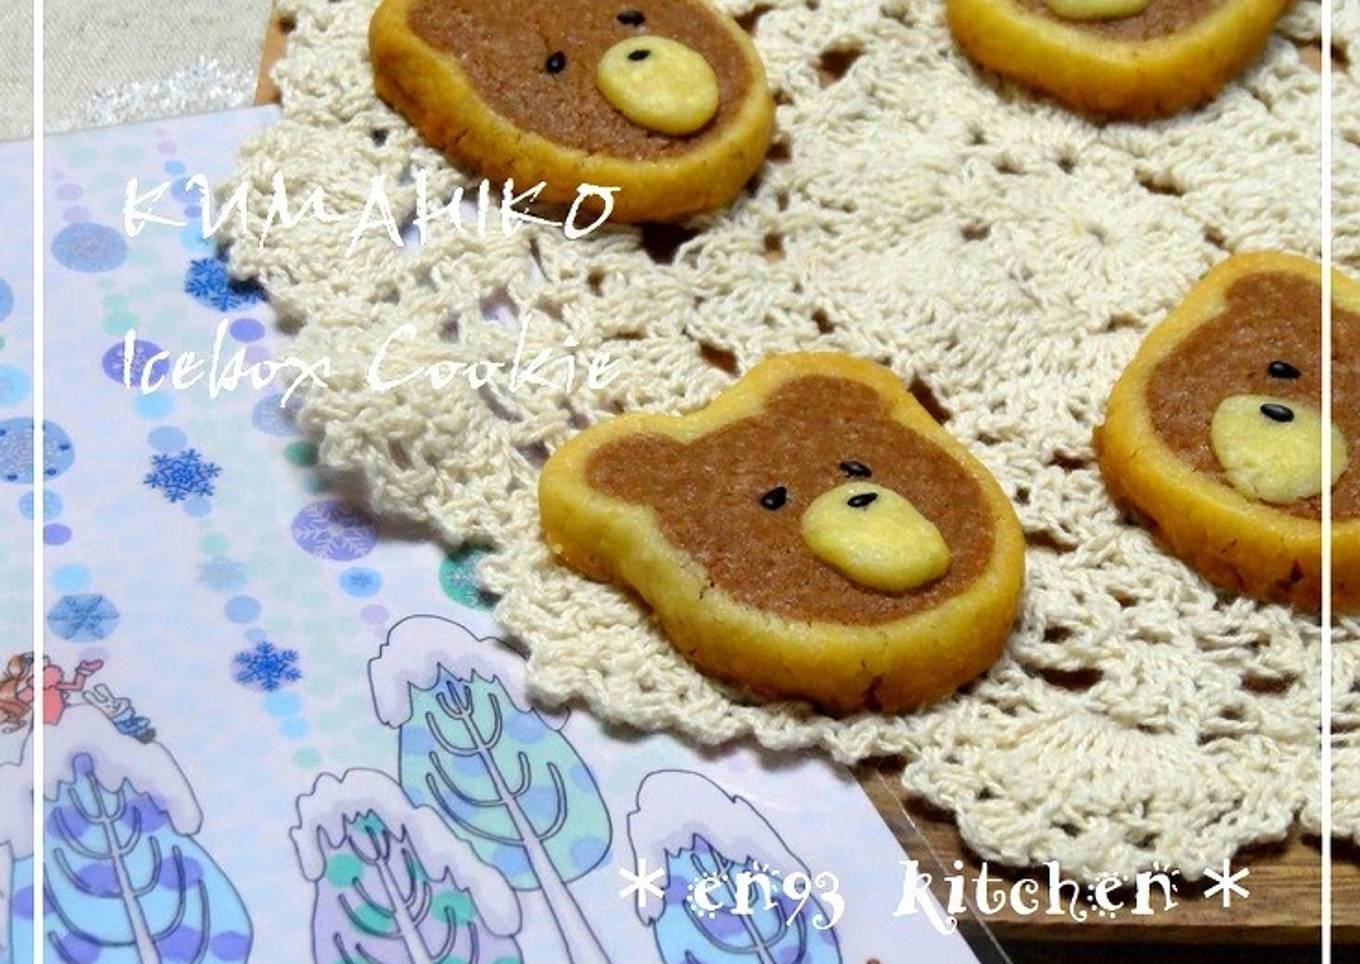
I wanted to make cute cookies without drawing the face in chocolate or icing after baking. I thought it would work if I used sesame seeds for Kumahiko. Every time when you form the shapes, keep the dough in the freezer until you are ready to use it. Then it will be easier to work with! However, please be careful not to leave the dough in the freezer for too long, otherwise it breaks easily when you slice it. After 20 minutes in the freezer, move the dough to the fridge. For about 30 cookies. Recipe by En93
Ingredients and spices that need to be Get to make "Kumahiko" Bear Icebox Cookie:
- 170 grams Cake flour
- 70 grams Raw cane sugar
- 120 grams Unsalted butter
- 1 Egg yolk
- 1 tsp Cocoa powder (unsweetened)
- 1 pinch Salt
- 1 Black sesame seeds for eyes and nose
Steps to make to make "Kumahiko" Bear Icebox Cookie
- Bring the butter to room tempearture or microwave at 600 W for 30-40 seconds to soften. If you decide to use the microwave, please be careful not to melt it.

- Knead the butter until creamy.

- Add the raw cane sugar in 2-3 batches and stir well.

- Once the sugar has been incorporated, add the egg yolk. Mix some more.

- Mix it until it looks like this picture.

- Sift the flour into the bowl.

- Use a rubber spatula to combine by cutting into the dough.

- The mixture turns crumbly like this picture.

- Take 210 g of dough out and mix with cocoa powder using a cutting motion.

- Divide the cocoa dough into 3 portions: 1 big ball for the face and other 2 small balls for ears. And also divide the plain dough into 2 portions: 1 big ball for the edge of the cookies and 1 small ball for the nose.

- Roll the big cocoa ball for the face into a thick rolling pin-like shape. Roll the 2 small balls for ears into thin sticks.

- Shape the thick piece into an oval shape as kumahiko has a little bit of an oval-shaped face.

- Make grooves with a chopstick for ears.

- It should look like this picture.

- Now place the thin sticks into the grooves.

- The end looks like this. Wrap with parchment paper or plastic wrap and place in the freezer.

- Meanwhile, roll the plain small ball (for nose) into a thin stick. Wrap with parchment paper or plastic wrap and keep in the freezer.

- Roll out the plain big ball wide enough to wrap around the face.

- When you stretch the dough, try using parchment paper. Fold the paper into a rectangle with the dough inside and roll it out. It makes beautiful rectangle shape. NOTE: This picture shows cocoa dough, but you'll be rolling out the plain dough.

- Freeze for 5 minutes to make it easy to remove the parchment paper. Note: Apologies again for using cocoa dough for this picture.

- Roll it like this. Gently press the dough between the ears and around the cookie. Let it rest again in the freezer.

- After 20 minutes, take it out of the freezer and store in the fridge for 30 minutes. Slice into 4-5 mm thick cookies with knife.

- Take the thin stick for the nose out of the freezer and slice it very thinly. It should be easy to make thin slices since the dough is cold.

- Place the face cookies on a baking tray lined with parchment paper and begin preheating your oven to 180°C. Meanwhile, place the sliced nose cookies on the face.

- Use black sesame seeds for the nose and eyes. Dip the tip of a chopstick in a water and put the sesame seed on it. It will make them easier to work with.

- Please refer to Step 26 offor the sesame seed's decoration.

- Bake in the oven preheated to 180 °C for 17 minutes. Open the oven door after 7-8 minutes and cover with aluminium foil to avoid darkening the colors.

- Done! Please adjust the temperature and time depending on your oven.

You will also detect as your own experience and confidence grows that you will see yourself more and more usually improvising as you move and adjusting recipes to fulfill your own personal preferences. If you prefer more or less of ingredients or want to produce a recipe somewhat more or less hot in flavor that can be made simple adjustments along the way in order to achieve this objective. Quite simply you will begin in time to create recipes of your individual. And that is something which you won't fundamentally learn when it has to do with basic cooking skills to novices however you'd never learn if you didn't master those simple cooking skills.
So that is going to wrap it up with this special food Recipe of Perfect "Kumahiko" Bear Icebox Cookie. Thank you very much for reading. I'm sure you can make this at home. There is gonna be interesting food in home recipes coming up. Remember to bookmark this page in your browser, and share it to your family, colleague and friends. Thank you for reading. Go on get cooking!
Post a Comment for "Recipe of Super Quick Homemade "Kumahiko" Bear Icebox Cookie"